Last updated on August 16th, 2022 at 11:50 am
How to install WordPress in Hostinger: you can do it by Auto Installer option or Manual process.
Suggested option for WordPress installation is Hostinger Auto Installer.
You can install fresh WordPress in few clicks by Hostinger Auto Installer option.
Following are steps to Hostinger Auto Installer option use for WordPress installation.
- Login to your Hostinger account.
- Click “Hosting” option from top menu.
- Find your domain(where you want to install WordPress) and click Manage button.
- Go to Website section.
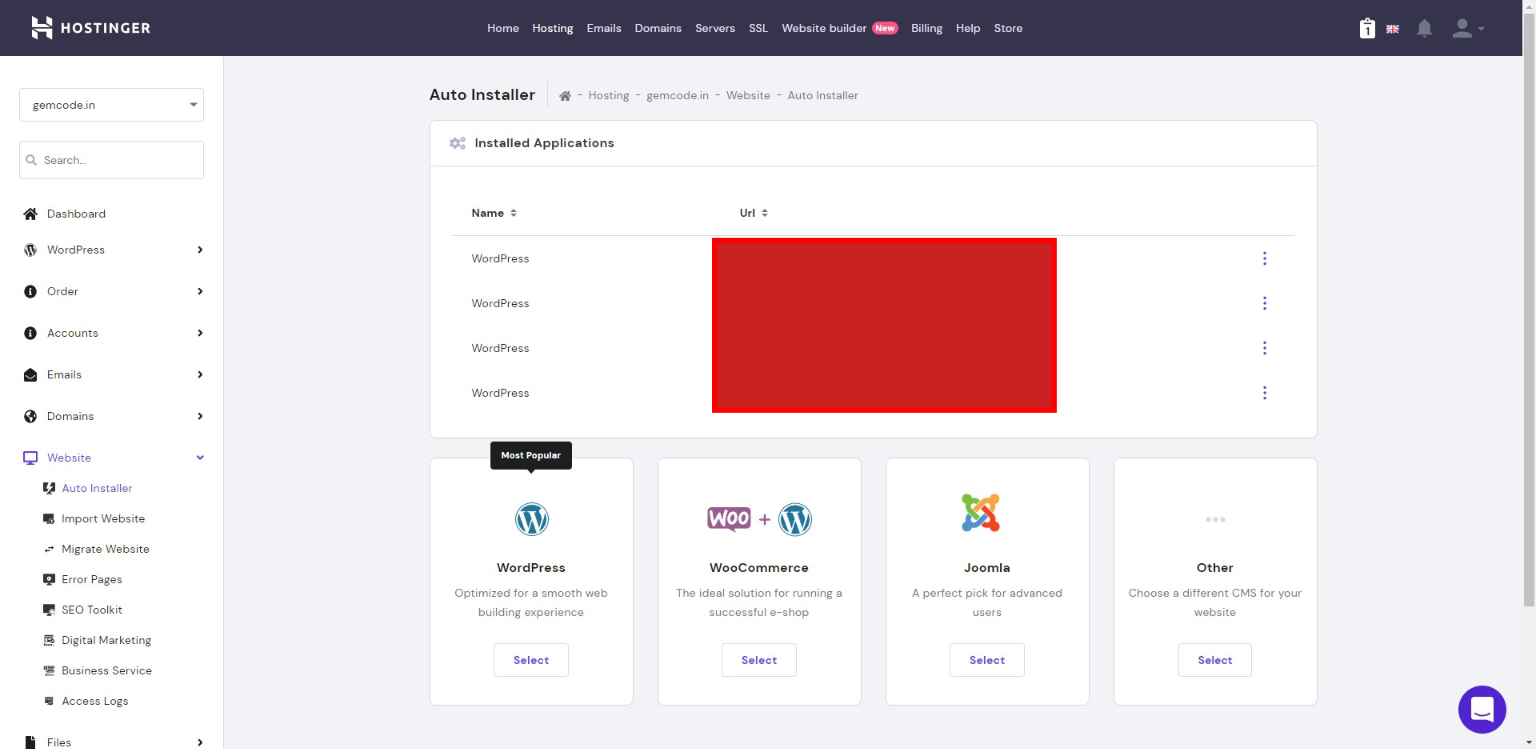
- Now, click on Auto Installer option.
- Select WordPress option from list.
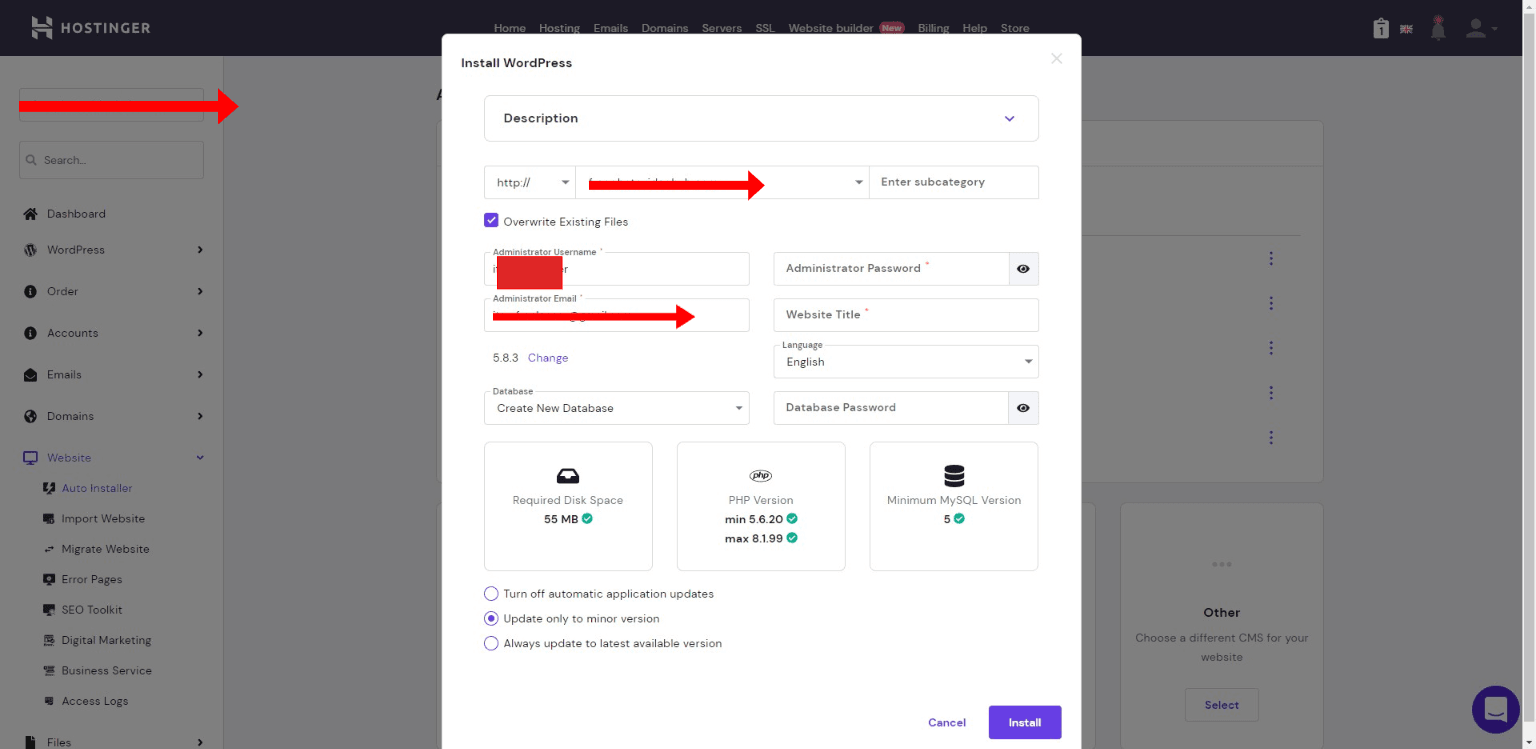
- Insert required blog/site details
- Domain scheme.
- Overwrite Existing Files.
- Administrator Email.
- Website title.
- WordPress version.
- Language.
- Press Install button and wait for process completion.


Your article helped me a lot, is there any more related content? Thanks!